3D Printed Topological Maps
Project about and 3D printing maps of trekking destinations in the Himalayas
I worked on this project over the2018 summer at the Centre of Molecular Dynamics, Kathmandu, Nepal.
Team members: Anuj Baskota, Ritwicq Arjyal, Ayush Baral (Undergraduates)
The map has been a paramount tool in exploring and describing almost every place that has been known to humankind. Latterly, with the advancement of technology, digital maps like google map is a crucial part of life for millions of people. Trekking and hiking have also been safer and easier with the use of a map. With the increasing popularity of digital maps, paper maps with several topographical features are less common among the youth as it is harder to navigate and follow. This project focuses on 3D printed maps which depict a clear picture of a trail or a location. Overall, it acts as a miniature version of the exact location which can help the trekkers to compare the trails with the 3D maps and get a better idea of their pathway.
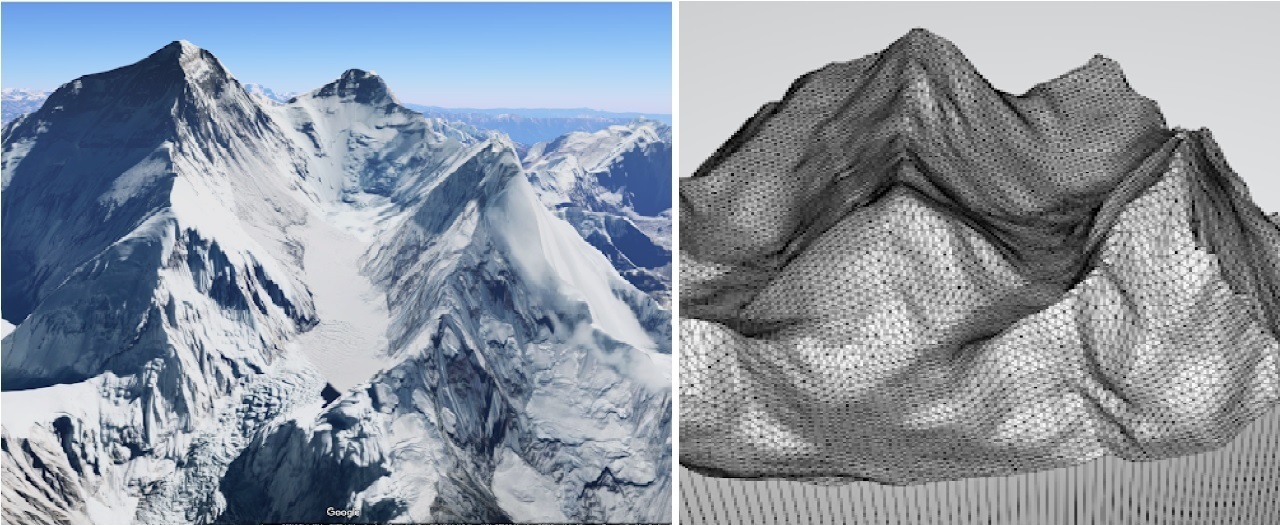
The first part of the project was to create a blueprint( a STL file) of the desired map which could be 3D printed. One way to do that was using Terrain2STL generator which uses SRTM3 dataset from 2000. Its resolution is about 90 meters on the equator. This website allows a user to draw a box around the desired area in google map and generates the stl file.

Google map’s satellite image of everest and it’s STL file generated using Terrain2STL.
In order to improve the STL files, they were uploaded in Meshmixer to increase the width as well as sharpen some of the peaks. Similarly, the maps could be customized to certain natural landmarks like lakes, mountain peaks, rivers, or even hiking trails or gorges. The dimensions could be easily altered and the redundant parts of the map could be cut out to generate a model with great aesthetics.

Left to right: the raw STL, sharpness added, height increased.
After 3D printing it using TEVO Black widow printer, we obtained some decent prints of the map. The maps were harder to print because of the layers that they form which causes a good amount of filament stringing. Although the print quality was fair, the prints could definitely give us a rough idea of the surrounding mountain trails. The weight of the prints was approximately ___ for the dimension of the 4cm*4cm*3cm model. The cost of the filament used was approximately less than 25 cents for this model.The time taken to print a decent model was less than 3 hours. The following are the print and picture of theAnnapurna mountain range seen from Ghandruk Village in Nepal.

3D printed mountain range and the actual mountain range.
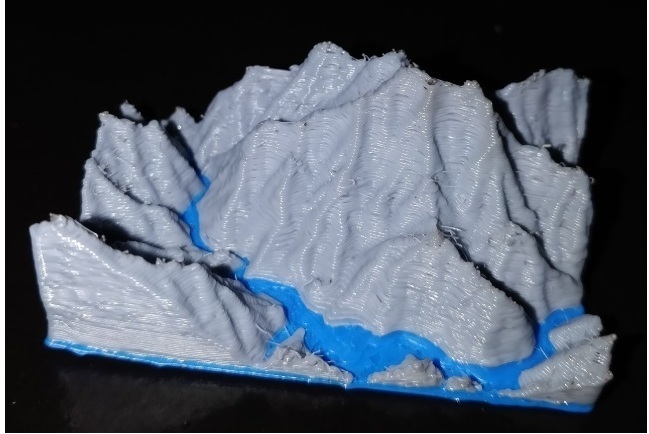
Furthermore, we decided to print map models with clear details of its surrounding. This includes printing in different colors to distinguish landforms, printing milestones in the hiking trail, or even marking notable landforms in the trek. Unfortunately, the 3D printer that we were using had only one extruder. We did try to print a landform with a river flowing in the middle by printing the base of different colors and changing the filament mid-print to have the hills of a different color. Although it was not the best way to print multi-colored models, the result was certainly not disappointing. The map model looked much better than monochromic models. Therefore, multiple extruder printers could be used to print better-looking detailed models which would serve the purpose of 3D maps better.

Overall, 3D printed maps could be of great help to trekkers to locate where they are in the trail, especially in mountain ranges. The treks in the Himalayas could be treacherous and several hikers get lost frequently because of the complicated and confusing trial routes. These super-light weighted maps can be a guide to the location of the trekker using the surrounding mountains as apoint of reference. Similarly, these maps could also be used as a cheap small souvenir of the hiking place. Using 3D technology, maps could be made easier to navigate, fun as well as significant.